Why this Recipe Is Amazing
- Flavour & texture: These Chewy-Soft Choc Chunk Cookies use nice-sized choc chunks, so there are big melty puddles of chocolate in every bite.
- Difficulty: 1/5. One bowl Magic! This recipe is really simple just mix, roll, refrigerate and bake.
- Time: 1.5 hours! Mainly that is just refrigeration time to help the cookies keep their shape.
- Versatility: Yes yes yes! Add nuts and candies, the world is your oyster.

What ingredients are needed for Chewy-Soft Choc Chunk Cookies
- Lightly salted butter: Yes, I’m a salted butter fan. I opt for a grass-fed, higher fat-content butter that is lightly salted to enhance the flavours of the butter itself. You may use unsalted butter but you must then add 1/2 tsp salt.
- Light brown sugar: The secret to a rich caramel flavour in baked goods is using brown sugar. I prefer to use light brown sugar mostly but if you do not have access to brown sugar, use more white sugar and 1 tbsp molasses. Not all brown sugar is equal, the darker the colour, the more molasses is present. In recipes such as brownies and cookies, this affects the chewiness of the end result.
- White sugar: I prefer to use a fine caster/bakers sugar as it dissolves quicker and its what I stock in my house. Yes you can add granulated sugar as it is exactly the same, just small, finer granules. You can also make your own caster sugar! Simply add to a blender and… blend! The smaller the granule size means its quicker to dissolve.
- Vanilla bean paste/extract: Vanilla extract is not necessary for the structure of this or any baking recipe. However, leaving it out will change the flavour, some recipes more that others. Vanilla in baking is like adding salt to savoury foods, it enhances all the other flavours in the recipe. Without it, cookies and cakes don’t have the richness that we know and love. I use a vanilla bean paste with seeds but extract is just as good.
- Large egg: Large eggs are always recommended when baking so that they give consistent results every time and you avoid having an ‘eggy’ taste. Use eggs in cartons labelled “large eggs” which are 55 – 60g / 2 oz each. This is an industry standard and most international bakers’ recipes use this size. In a pinch and have larger eggs? Crack egg into a bowl, whisk then measure out 50 ml / 48-50 grams. Ta-dah!
- Plain flour: Simple all purpose flour is all you need. The moderate level of protein (gluten) gives a soft but chewy texture. You can also try substituting a little bread flour (1/4 cup) to give you extra chewiness. Weighing your flour is a preference to ensure you do not add too much flour. If you choose to use cups please ensure you do not pressurise the flour in the measuring cup and add too much.
- Baking soda: Not to be confused with Baking powder. Baking soda is also known as bi-carb soda or sodium bicarbonate. It is a classic leavener you’ll need when it comes to some cakes, cupcakes and muffins. Baking reacts with a acidic agent to create air bubbles, thus leavening our cookies and baked goods. The acid in the brown sugar will act as the acid and give us softer cookies. Can be substituted for 1 1/2 tsp baking powder but results will vary slightly.
- Chopped Chocolate: I love a mixture of milk & dark chocolate for added flavour. To get those delicious puddles of chocolate you’ll need to use chopped pieces of chocolate from a block. You can use chocolate chips but your cookies will not be as gorgeously gooey. Chocolate chips are designed to keep their shape when baked and firm up as they cool. The result will still be yummy, just different.

How to make Chewy-Soft Choc Chunk Cookies
- Mix the Dough:
- In a large bowl, mix butter, sugars and vanilla together using a spatula. Mix in egg and set aside.
- Add the flour and baking soda into bowl and stir until just combined. Gently stir in chopped chocolate.
- Line 2 trays with baking paper and set aside.
- Form the balls :
- Using a cookie scoop or a a tablespoon, scoop balls of dough onto one of the prepared tray. Note: they are going to be chilled, so you can place them close together.
- Get the prettier cookies: Press more chopped chocolate pieces on the top. They will melt into the surface and give you extra gooey deliciousness! Who doesn’t love more chocolate!
- Using a cookie scoop or a a tablespoon, scoop balls of dough onto one of the prepared tray. Note: they are going to be chilled, so you can place them close together.
- Refrigerate:
- Cover the tray with cling film and refrigerate the cookie dough for 1 hour or until needed. Dough can also be frozen at this stage and you’ll have fresh cookies whenever you desire!
- 30 minutes before you are ready to bake, preheat oven to 180°c/ 350°f.
- Bake in the oven for approximately 10-12 minutes Bake until edges are just lightly browned. Rotate the trays halfway through baking if you necessary. Slightly under baked cookies achieve a soft and chewy centre.
- Allow to cool for 5 minutes to help them firm up slightly before transferring to a cooling rack or plate. Leaving on the tray will cause them to continue cooking and the centre wont stay soft & chewy.

Setting you up for success – Tips, Tricks
- Weigh or measure flour properly – Do you know that scooping flour out of the container can actually compress the flour and you’ll possibly end up with ~50% extra! Compressed flour = Over-measuring = dry, dense and cakey baked products. Weighing is ALWAYS recommended. Grab kitchen scales and you’ll get much more consistent results. If you don’t have scales, you have two options. 1. spoon flour into the measuring cup or 2. use the cup to stir and ‘fluff up’ the flour before scooping and measuring, so that it isn’t packed.
- Chill the dough: Chilling the dough before baking can help to prevent your cookies from spreading too much, which can result in thinner, crisper cookies. Chilling the dough for 24-48 hours also allows the flavours to meld and develop, resulting in a more complex and delicious cookie.
- Don’t overmix the dough: Overmixing the dough can lead to tough, dense cookies. Mix the ingredients until just combined, and then stop.
- Slightly under-bake the cookies: To create a softer and chewier texture, undercook slightly. Continue to bake as they cool, so it’s important to remove them from the oven when they still look slightly underdone in the centre. They will firm up as they cool, but will retain a softer texture if they are not overbaked.
- Allow to cool on the tray before transferring – Allow the cookies to cool for 5 minutes to help them firm up slightly before transferring them to a cooling rack or plate. Leaving them on the tray will cause them to continue cooking and the centre won’t stay soft & chewy.
Frequently Asked Questions
Using melted butter instead of softened butter can help to create a chewier texture in your cookies. Melted butter coats the flour proteins, preventing them from forming too much gluten. When butter is melted, it separates into fat and milk solids. The milk solids, which contain water and proteins, help to hydrate the flour in the dough. When the flour is hydrated, it becomes softer and more pliable, which can lead to a chewier texture in the finished cookies.
Brown sugar contains molasses, which helps to create a chewy texture in cookies. Therefore, using a combination of brown sugar and white sugar can help you achieve a chewy texture in your chocolate chip cookies.
Don’t have brown sugar? You can substitute white sugar for brown sugar in cookies, but keep in mind that the texture and flavour of the cookies will be different. Brown sugar gives it a rich, caramel-like flavour and also makes the cookies more moist and sticky. Just using white sugar means your cookies may be crisper and less chewy, and they may have a slightly different taste. Use 85gm white sugar then make up the rest with molasses, golden syrup, maple or honey.
Creaming butter and sugar creates a light and fluffy texture in baked goods, but we are aiming for a denser and chewier texture. By skipping this step, the sugar doesn’t dissolve as much into the butter, resulting in a more compact crumb. Melted butter can be used instead to help the cookies spread more during baking, resulting in a thinner, chewier cookie that’s slightly crispy on the edges and soft in the middle, which is desired in chocolate chunk cookies.
After step 4, cover and refrigerate the dough balls for ~4-5 days or freeze for up to 3 months. Simply place onto a lined tray (if frozen, allow to sit at room temp for 10 minutes) and bake at 180°c/ 350°f as per step 7.
Keep cookies in an airtight container at room temperature for 3-4 days.
Other Recipes to Try!

Did you make this recipe?
Let us know how it turned out for you! Comment below, tag @missmolly_makes on Instagram using #missmollymakes or visit us LIVE at twitch.tv/missmollymakes.com

The Ultimate Chewy-Soft Choc Chunk Cookies
Equipment
- 1 large bowl
- 2 baking trays
Ingredients
- 85 g (⅓ cups + 1 tbsp) lightly salted butter melted
- 105 g (½ cups) light brown sugar
- 65 g (⅓ cups) white sugar
- 9 g (2 tsp) vanilla bean paste or extract with seeds
- 1 large egg
- 160 g (1¼ cups) plain flour
- ½ tsp baking soda
- 70 g (½ cup) milk chocolate roughly chopped
- 70 g (½ cup) dark chocolate roughly chopped
Instructions
- In a large bowl, mix butter, sugars and vanilla together using a spatula. Mix in egg and set aside.
- Add the flour and baking soda into bowl and stir until just combined. Gently stir in chopped chocolate.
- Line 2 trays with baking paper and set aside.
- Using a cookie scoop or a a tablespoon, scoop balls of dough onto one of the prepared tray. Note: they are going to be chilled, so you can place them close together.Get the prettier cookies: Press more chopped chocolate pieces on the top. They will melt into the surface and give you extra gooey deliciousness! Who doesn't love more chocolate!
- Cover the tray with cling film and refrigerate the cookie dough for 1 hour or until needed. Dough can also be frozen at this stage and you'll have fresh cookies whenever you desire!
- 30 minutes before you are ready to bake, preheat oven to 180°c/ 350°f.
- Bake in the oven for approximately 10-12 minutes Bake until edges are just lightly browned. Rotate the trays halfway through baking if you necessary. Slightly under baked cookies achieve a soft and chewy centre.
- Allow to cool for 5 minutes to help them firm up slightly before transferring to a cooling rack or plate. Leaving on the tray will cause them to continue cooking and the centre wont stay soft & chewy. Enjoy!
Notes
Nutrition
Nutritional information is only an estimate. The accuracy of the nutritional information for any recipe on this site is not guaranteed.

Hiya, I’m Lauren but you can call me Molly!
Former OR Nurse and self-taught home cook passionate about Approachable, No-Nonsense recipes to help you level up in the kitchen. Together with my husband Troy, we create simplified dishes for busy people with easy-to-find ingredients!
To learn more about us, our cooking show and more, click here!
— Recent Recipes —
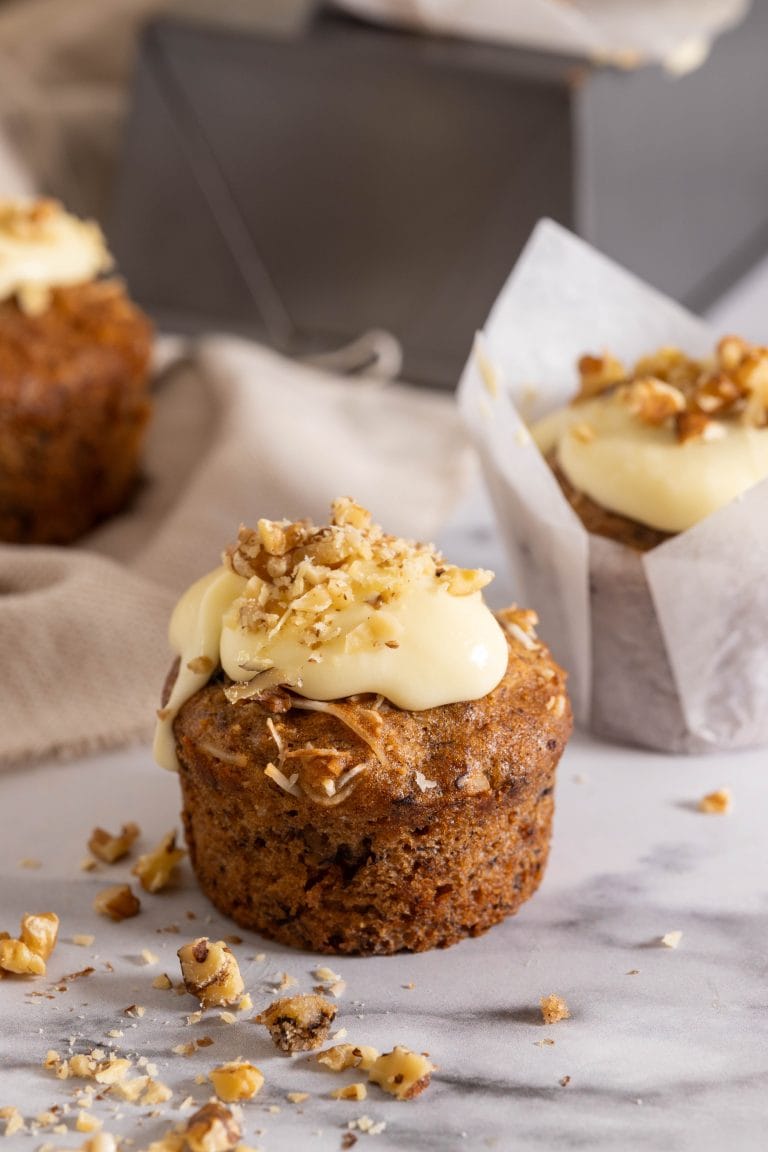
- Banana Coconut & Pineapple (Hummingbird) Cupcakes with Cream Cheese Frosting
- Crispy Pork & Mushroom Dumplings

- Hunter’s Hearty Beef Pie

- Seared Beef Sushi / Aburi

Our Latest ebook
It’s full of Aussie summer recipes, not just from Christmas!